
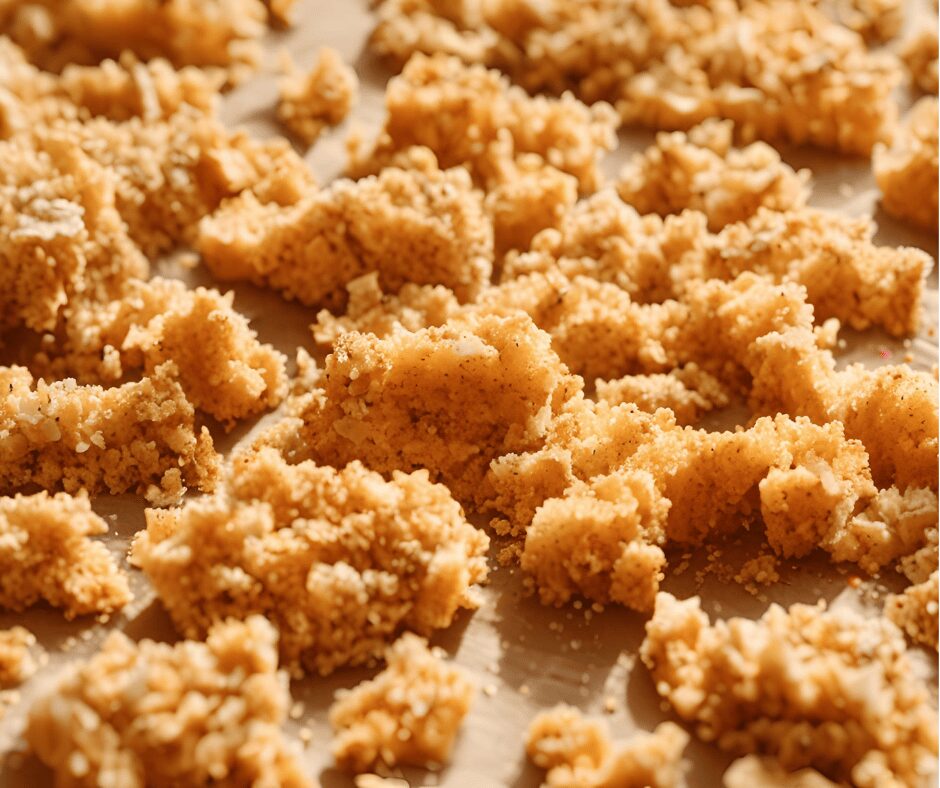
Imagine a kitchen where everything is versatile, simple, and efficient. Now, picture yourself creating a humble yet essential ingredient: bread crumbs. It’s a kitchen staple that often goes unnoticed but is crucial in countless recipes. Whether breading chicken or adding a crunchy topping to casseroles, bread crumbs lend an irresistible texture and flavor. But how do you transform a loaf of bread into these golden, crisp morsels? Let’s embark on a culinary journey to discover the art of making bread crumbs at home. Not only will you create a pantry staple, but you’ll also unlock the potential to elevate your dishes in ways you never thought possible.
Homemade Bread Crumbs
Equipment
- Oven
- Baking sheet
- Food processor (or rolling pin if crushing by hand)
- Airtight container for storage
Ingredients
- 4 slices of bread (preferably stale)
- 1 tablespoon olive oil (optional)
- 1/2 teaspoon salt (optional)
- 1/2 teaspoon garlic powder (optional)
- 1/4 teaspoon dried herbs (optional, like thyme or oregano)
Instructions
Preheat your oven to 350°F (175°C).
Tear the slices of bread into small pieces and place them on a baking sheet.
Drizzle the bread pieces with olive oil (if using) and sprinkle salt, garlic powder, and dried herbs over them.
Toast the bread pieces in the oven for about 10-15 minutes, or until golden and crispy. Stir halfway through to ensure even browning.
Once toasted, remove the bread from the oven and let it cool.
Once cool, pulse the toasted bread pieces in a food processor until fine crumbs form. You can also crush them by hand for a coarser texture.
Store your homemade bread crumbs in an airtight container at room temperature for up to 2 weeks.
Notes
- You can use any type of bread for this recipe, such as white, whole wheat, or sourdough. For gluten-free bread crumbs, use gluten-free bread.
- Bread crumbs can be stored in an airtight container for up to 2 weeks. You can also freeze them for longer storage.
- For a more flavorful crumb, add a pinch of your favorite spices like paprika or Italian seasoning.
- This recipe works well for fresh bread too, but stale bread will yield the best texture.
Why You’ll Love This Recipe
If you’re still debating whether to try making your breadcrumbs, here are a few reasons that will convince you:
- Quick and Easy: This recipe requires minimal ingredients and can be completed in under 30 minutes, making it the perfect solution when you need bread crumbs fast.
- Budget-Friendly: Rather than buying pre-made bread crumbs, you can use leftover or stale bread, turning it into something useful and saving money.
- Customizable: You can adjust the texture (fine or coarse) and add your favorite seasonings to make these bread crumbs work for any dish. Whether you prefer a classic version or want something more flavorful, this recipe covers you.
Key Selling Points
- Quick and Easy: Making your breadcrumbs takes only a few simple steps. From start to finish, it’s a fast and straightforward process.
- Budget-Friendly: Instead of tossing out stale bread, turn it into something useful! You save money by using what you already have at home.
- Customizable: You can personalize your bread crumbs by adjusting the texture (fine, medium, or coarse) and adding your favorite herbs or seasonings.
- Perfect for Various Dishes: Whether you’re breading chicken, topping casseroles, or making stuffing, homemade bread crumbs are versatile and enhance many recipes.
- No Preservatives: When you make bread crumbs at home, you avoid the artificial preservatives found in many store-bought versions.
Key Ingredients and Substitutions
- Bread: The star of this recipe! You can use any type of bread—white, whole wheat, sourdough, or even gluten-free. Each variety gives the bread crumbs a unique texture and flavor.
- Substitution: If you’re out of bread, you can even use leftover rolls, bagels, or buns. Just make sure they’re dry or stale for the best crunch.
- Olive Oil: Adding olive oil helps achieve a golden, crispy texture for the bread crumbs. It also adds a slight richness.
- Substitution: If you prefer, you can use melted butter or skip the oil altogether for a lighter version.
- Seasonings (Optional): This is where you can get creative! Garlic powder, onion powder, Italian seasoning, paprika, or even a bit of Parmesan cheese can be added to customize the flavor.
- Substitution: Feel free to experiment with other herbs or spices based on what you’re making. For example, dried thyme or rosemary work well for a more savory breadcrumb.
Crucial Ingredients and Possible Alternatives
When making homemade bread crumbs, these ingredients are essential:
- Bread: The main ingredient in bread crumbs. You can use any type of bread you like, including white bread, whole wheat, sourdough, or even gluten-free bread. The type of bread will affect the flavor and texture of the final product.
- Alternatives: If you don’t have regular bread, you can also use leftover rolls, baguettes, or even bagels. Just ensure the bread is either stale or dried out for best results, as fresh bread can be too soft and won’t crisp up as well.
- Olive Oil: This ingredient is optional but recommended, as it helps to achieve a golden, crispy texture for the bread crumbs.
- Alternatives: You can substitute olive oil with melted butter for a richer flavor. If you’re looking for a lighter option, you can skip the oil entirely, though the crumbs might not get as crispy.
- Seasonings (Optional): Adding seasonings is where you can get creative! You can use garlic powder, onion powder, Italian seasoning, paprika, or even Parmesan cheese to add flavor to your bread crumbs.
- Alternatives: If you’re not a fan of any of the mentioned seasonings, feel free to use your favorites, such as fresh herbs like rosemary or thyme, or try a spicy kick with cayenne pepper.
How to Make Bread Crumbs (Step-by-Step)
Making bread crumbs at home is a simple process, and once you try it, you’ll never go back to store-bought again. Here’s how to do it:
Step 1: Choose Your Bread
Select any bread you like. While stale or dried bread is best for making crumbs, you can use fresh bread too. If your bread is fresh, you may want to dry it out by leaving it out on the counter for a few hours, or lightly toasting it in the oven to speed up the process.
- Tip: For fine breadcrumbs, white bread or sandwich bread works best, while whole wheat or sourdough can be used for a heartier, more flavorful crumb.
Step 2: Prepare the Bread
Once your bread is ready, cut or tear it into smaller chunks. You don’t need to worry about being too precise at this stage, as you’ll be pulsing it into smaller crumbs later.
- Tip: If you’re using a food processor, breaking the bread into smaller pieces will help it process more evenly.
Step 3: Process the Bread
Place the torn or cut pieces of bread into a food processor. Pulse the bread in short bursts until you reach your desired crumb size. For fine bread crumbs, pulse more; for coarser crumbs, pulseless. The food processor will do most of the work, so this step is super quick.
- Tip: Don’t over-process unless you want ultra-fine crumbs! You can always pulse again if you need smaller crumbs.
Step 4: Toast the Bread Crumbs (Optional)
If you like your bread crumbs to be extra crispy, you can toast them in the oven or on the stovetop. To toast in the oven, spread the crumbs evenly on a baking sheet and bake them at 350°F (175°C) for about 10-15 minutes. Stir them halfway through to ensure they toast evenly and don’t burn.
- Tip: If you’re short on time, you can also toast the crumbs in a skillet over medium heat. Just toss them in a little olive oil (if using) and stir occasionally until they reach your desired level of crispiness.
Step 5: Cool and Store
Once your bread crumbs are toasted and cooled, they are ready to use. Let them cool completely before storing them in an airtight container. You can store them in the pantry for up to a week or in the fridge for a longer shelf life.
Also Discover: The Best Joy’s Banana Bread Recipe – A Simple and Delicious Classic
- Tip: If you’ve made a large batch, you can freeze the bread crumbs for up to 3 months. Just make sure to store them in a tightly sealed bag or container to prevent freezer burn.
Making your own bread crumbs is simple, and affordable, and ensures you get exactly the texture and flavor you want. Whether you use them for breading, stuffing, or sprinkling over dishes, homemade bread crumbs will elevate your cooking!
Expert Tips for Success
To make the best homemade bread crumbs, here are some insider tips and tricks to ensure your bread crumbs turn out perfect every time:
- Use Stale Bread: If your bread is fresh, it might not crisp up well. Stale bread or slightly dried-out bread works best because it has less moisture and will toast up nice and crispy. If you don’t have stale bread on hand, just leave it out on the counter for a few hours or toast it lightly in the oven to dry it out.
- Pulse, Don’t Over-Process: The texture of your bread crumbs depends on how much you pulse them. If you want fine crumbs for breading, pulse more. If you prefer coarser crumbs for topping casseroles, pulse just a few times. Over-processing can turn the crumbs into powder, so keep an eye on the consistency.
- Toast for Extra Crispiness: If you want your bread crumbs to be extra crispy, toast them in the oven or on the stovetop. Even a few minutes of baking will give them a lovely golden color and crunchy texture. But be sure to stir them occasionally to avoid burning.
- Avoid Overcrowding the Baking Sheet: When toasting the crumbs in the oven, spread them out in a thin, even layer. If you overcrowd the sheet, the crumbs may steam instead of toast, resulting in soggy crumbs. Make sure there’s plenty of space for them to crisp up evenly.
- Season Early: If you’re adding herbs, spices, or Parmesan, do so before toasting. This helps the flavors infuse into the crumbs, ensuring they’re flavorful throughout. You can also toast the breadcrumbs in a bit of olive oil for extra flavor and crunch.
- Store Properly: Store your homemade bread crumbs in an airtight container to keep them fresh. If you live in a humid environment, consider refrigerating or freezing them to prevent them from going stale too quickly.
Variations and Customizations
There are plenty of ways you can adjust this recipe to suit your preferences or dietary needs. Here are some ideas:
- Gluten-Free Bread Crumbs: If you’re following a gluten-free diet, simply use gluten-free bread. The method remains the same, and the result will be perfect gluten-free crumbs. You can use store-bought gluten-free bread or make your own, depending on your preference.
- Herbed Bread Crumbs: To give your bread crumbs an aromatic boost, add dried or fresh herbs. Rosemary, thyme, or oregano are excellent choices for savory dishes. Add about 1 teaspoon of dried herbs per 4 slices of bread before processing.
- Spicy Bread Crumbs: If you like a bit of heat, add some chili flakes, cayenne pepper, or smoked paprika to your bread crumbs. This is a great option for breading chicken tenders or adding extra flavor to casseroles.
- Cheese-Infused Bread Crumbs: For a cheesy twist, mix in grated Parmesan cheese or cheddar before toasting. This will add richness and flavor to your bread crumbs, perfect for topping pasta or casseroles.
- Vegan Bread Crumbs: If you’re following a vegan diet, simply skip the cheese and stick to plant-based bread options. Olive oil or vegetable oil can be used instead of butter for added crispiness.
- Panko-Style Bread Crumbs: If you prefer a lighter, airier texture, try using a white sandwich bread and pulsing it more to create panko-style crumbs. These are great for frying and breading since they create a super crispy coating.
- Savory Add-Ins: Consider adding garlic powder, onion powder, or even a little lemon zest to create flavored bread crumbs that will add depth to your dishes. This works especially well if you’re using the crumbs in stuffings or for breading fish or vegetables.
Ways to Adapt the Recipe (e.g., Dietary Modifications, Flavor Twists)
Homemade bread crumbs are incredibly versatile and can be adapted to suit different dietary preferences or flavor profiles. Here are some fun twists and adaptations you can try:
- Gluten-Free Bread Crumbs:
For those on a gluten-free diet, simply use gluten-free bread as a substitute for regular bread. You can find various types of gluten-free bread in stores, or even make your own if you’re feeling adventurous. The process remains the same, and you’ll have delicious, crispy gluten-free bread crumbs in no time. - Vegan Bread Crumbs:
If you’re following a vegan diet, you can easily adapt this recipe by skipping any butter or dairy. Use olive oil or vegetable oil for the toasting step. Additionally, you can make them without any cheese or Parmesan. For an added savory flavor, try using nutritional yeast, which will provide a cheesy taste without the dairy. - Herb-Infused Bread Crumbs:
Add some fresh or dried herbs like rosemary, thyme, or oregano to your bread crumbs for an aromatic twist. This works especially well if you’re making the crumbs for stuffing or a savory breaded coating. Add about 1–2 teaspoons of your preferred herbs per 4 slices of bread to enhance the flavor profile. - Cheese-Flavored Bread Crumbs:
For extra richness, mix in some grated Parmesan, cheddar, or even vegan cheese before toasting the crumbs. This adds depth and a slight creaminess to your bread crumbs. It’s great for topping casseroles, pasta dishes, or using as a crunchy coating for fried foods. - Spicy Bread Crumbs:
Add a bit of heat with chili flakes, cayenne pepper, or smoked paprika. These spicy crumbs work wonderfully as a topping for spicy dishes or as a breading for chicken, fish, or even vegetables like zucchini or eggplant. Adjust the heat to your personal taste! - Panko-Style Bread Crumbs:
For a lighter, crunchier texture, use white sandwich bread and process the crumbs more coarsely. Panko-style crumbs are perfect for frying, as they create an extra crispy coating. They also work well when you need a crunchy topping for casseroles or gratins. - Nut-Free Bread Crumbs:
If you need nut-free bread crumbs, simply use your favorite nut-free bread. Be cautious of any added nuts or seeds in the bread you purchase if you’re sensitive or allergic. This keeps the recipe safe for those with nut allergies while maintaining its versatility. - Low-Sodium Bread Crumbs:
If you’re watching your sodium intake, try using low-sodium or unsalted bread. Skip the added salt in the recipe, or reduce it to your preference. You can also experiment with salt alternatives, such as potassium chloride-based salt substitutes.
Storage and Reheating Instructions
Homemade bread crumbs are easy to store and keep for a while, allowing you to make a batch and use it when needed. Here’s how you can store and reheat your homemade bread crumbs:
How to Store Bread Crumbs:
- In the Pantry: If you’re planning to use the bread crumbs within a week or two, you can store them in an airtight container in your pantry or kitchen cupboard. Keep the container in a cool, dry place away from direct sunlight or moisture.
- In the Refrigerator: For a longer shelf life (up to a month), store the bread crumbs in an airtight container in the fridge. This helps maintain their crispiness and prevents them from becoming stale too quickly.
- In the Freezer: If you’ve made a large batch or want to store them for a few months, freeze your bread crumbs. Place them in a freezer-safe bag or container, removing as much air as possible. Label the container with the date so you know when to use them by. They can be stored in the freezer for up to 3 months.
Reheating Bread Crumbs:
Bread crumbs, especially toasted ones, can be quickly reheated if they lose some of their crispiness after storage. Here’s how to do it:
- In the Oven: Preheat your oven to 350°F (175°C). Spread the bread crumbs evenly on a baking sheet and bake for about 5-10 minutes, stirring halfway through. This will help restore the crisp texture without overcooking them.
- In a Skillet: You can also reheat bread crumbs in a skillet over medium heat. Just add a little bit of oil or butter if you want them to be extra crispy, and stir the crumbs occasionally until they’re warmed through and crispy again.
- Microwave (Quick Method): If you’re in a rush, you can microwave your bread crumbs. Place them in a microwave-safe bowl and heat in 20-30 second intervals, stirring between each, until they’re warm and slightly crispy.
Serving Suggestions
Homemade bread crumbs are incredibly versatile and can be used in many ways across different meals. Here are some ideas for how to serve them:
- As a Topping:
Use your bread crumbs to top casseroles, mac and cheese, or gratins. They provide a crunchy contrast to creamy or cheesy dishes. Just sprinkle them on top before baking for a crispy finish. - For Breading:
Coat chicken, fish, or vegetables in your homemade bread crumbs for a crispy, golden crust. This works perfectly for fried or baked dishes. For extra flavor, try seasoning the bread crumbs with herbs, cheese, or spices. - In Stuffing:
Bread crumbs are a classic ingredient in stuffing for turkey or chicken. Add them to sautéed onions, celery, herbs, and broth for a delicious side dish. You can even make a stuffing mix with dried, seasoned crumbs. - As a Crumbly Salad Topping:
Sprinkle bread crumbs over salads for an added crunch. A Mediterranean salad with cucumbers, tomatoes, olives, and feta cheese pairs wonderfully with a handful of seasoned bread crumbs. - As a Side Dish for Soups:
Bread crumbs can be mixed into soups, particularly creamy ones like tomato soup or chowders, for texture. You can toast them with butter and herbs to make croutons, which add both flavor and crunch. - For Meatloaf or Meatballs:
Bread crumbs are often used as a binder in meatballs or meatloaf. They help keep the meat moist while adding texture. Try adding your own herbs and spices to customize the flavor.
Frequently Asked Questions (FAQs)
1. What is the difference between homemade bread crumbs and store-bought ones?
Homemade bread crumbs are fresher, customizable, and free of preservatives or artificial additives. You can adjust the texture and flavor based on your needs, and they tend to be more flavorful than pre-packaged crumbs.
2. Can I make bread crumbs without a food processor?
Yes, you can. Simply tear the bread into small pieces and place it in a plastic bag. Then, use a rolling pin or mallet to crush the bread into crumbs. You can also grate the bread with a box grater for a similar effect.
3. How do I make bread crumbs with gluten-free bread?
The process is the same as regular bread crumbs. Just use gluten-free bread as a substitute. Ensure the bread is dry or stale for best results, and toast it if necessary to ensure crispiness.
4. Can I use fresh bread for making bread crumbs?
Yes, but fresh bread can be too soft and won’t crisp up as well. If using fresh bread, either leave it out to dry for a few hours or toast it lightly in the oven before making the crumbs.
5. How do I store homemade bread crumbs for later use?
Store bread crumbs in an airtight container. They can be kept at room temperature for a few days, in the fridge for up to a week, or in the freezer for up to 3 months.
Related Recipes
If you love making your bread crumbs, you might also enjoy these recipes:
- Homemade Panko Bread Crumbs
A lighter, crispier alternative to traditional bread crumbs, perfect for breading fish or chicken for extra crunch. - Garlic Parmesan Bread Crumbs
These bread crumbs are seasoned with garlic and Parmesan cheese, making them an excellent topping for pasta dishes, casseroles, or roasted vegetables. - Classic Stuffing Recipe
Use your homemade bread crumbs to create a classic stuffing for Thanksgiving or family dinners. Add herbs, onions, and celery for a savory dish. - Crispy Baked Chicken Tenders
Coat chicken tenders in homemade bread crumbs, then bake them for a healthier alternative to fried chicken. Pair with a dipping sauce for a complete meal. - Cheese-Stuffed Meatballs
Use bread crumbs in meatballs as a binder and add extra flavor by stuffing them with gooey melted cheese. Perfect for pasta or as a standalone appetizer
Also discover: Easy Banana Bread Recipe No Butter For Beginners
Conclusion
To sum it up, breadcrumbs are more than just a design element; they’re an integral part of effective web navigation. From enhancing UX to improving SEO, breadcrumbs provide valuable benefits for both users and site owners. Whether you’re running an e-commerce store, a blog, or any other type of website, integrating breadcrumbs can significantly improve your site’s usability and search engine performance.